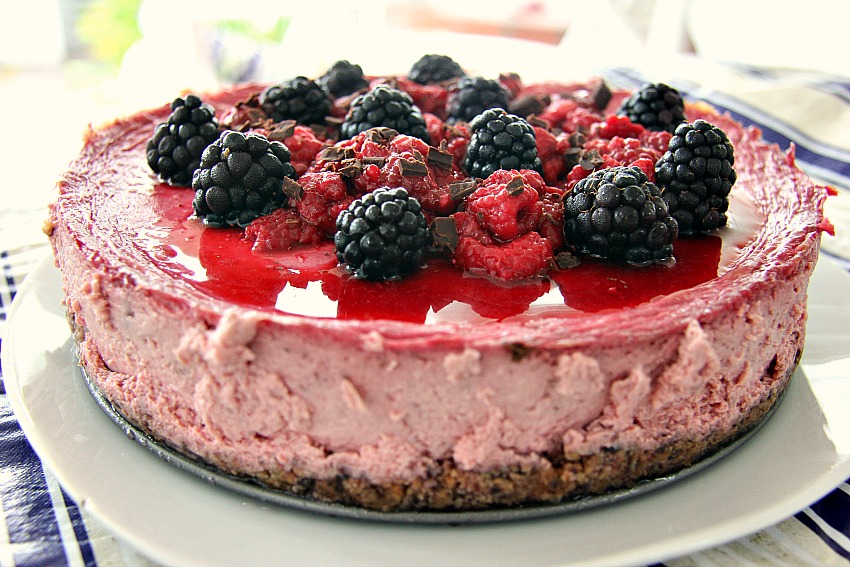
A delicious flavour combination of raspberry and hazelnut come together in this cheesecake. The base is made out of hazelnut flour and goes very well with the tartness of the raspberry.
I actually made this three times as I was waiting for the husband to go on a trip to the USA so that I could partake in some online shopping and purchase a spring-form cake tin. There are only a couple of shops here that sell them and the price is just ridiculous. It's bad enough that I have to pay over the odds for a cauliflower, but I will not be held to ransome over a cake tin.
I should have felt giddy with using so much precious and expensive hazelnut flour (well, here it is) but I was lucky enough to get 4 bags free from a local supermarket. The flour was heavily marked down from $41 to $4 a bag so I snatched all the remaining bags from the shelf into my basket. However, when I got to the checkout the original price scanned through. So, the supervisor had to be called and he just waved them through and said I could have them for free. One of my best days on the island!
The first time, I tried to bake the mixture in muffin tins along with a swirl of chocolate. This was a disaster and featured on my Facebook "fails". They exploded all over the place and looked inedible. Of course the Chief Taster munched them, but he just heard the word cheesecake and got stuck in.
The second attempt involved a giant muffin tin (it has six large muffin spaces) and I cut out parchment paper to line the bottoms. Without a spring-form cake tin, I was a bit nervous about them. They eased out of the tin much to my surprise and kept their shape. Good to know for future baking adventures. Although the taste was finally spot on, I was not happy with how they looked. The cheesecake colour was a pale pink.
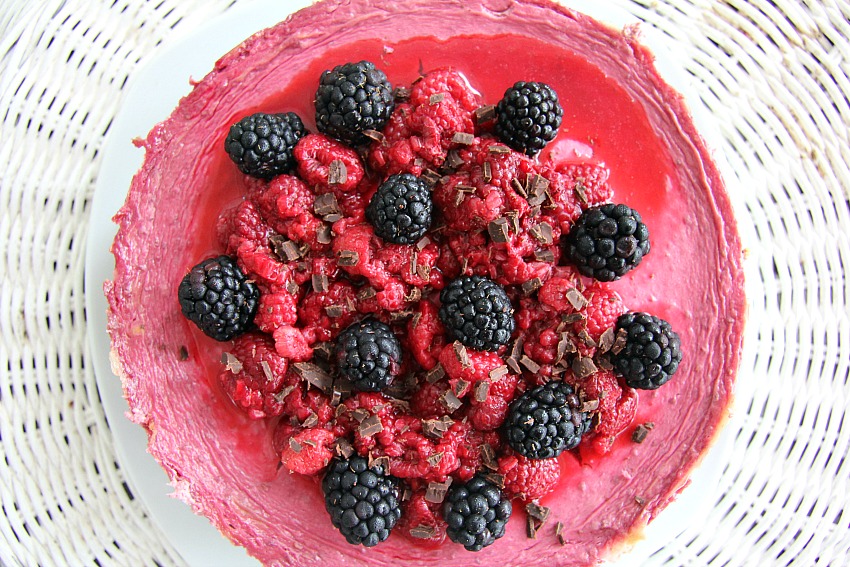
Third time lucky saw me finally in the possession of the correct cake tin and the oven went on! As soon as I poured the mixture into the tin, I knew that I had finally cracked this! It baked perfectly and was divine. I'd happily bake this for a fourth time, but I am out of hazelnut flour. I need to keep checking that supermarket again for bargain prices.

Yes, this did taste as good as it looks! And yes, we did have a slice the next day for breakfast. And no, we did not feel guilty. We'd do it again! Actually, we did when I baked another cheesecake a few weeks later. I will pre-warn you that this needs to be chilled in the fridge overnight. So if you wanted to eat it that day, baking it first thing in the morning might be okay for you to eat it in the evening. It needs a good 6-8 hours to set. But it is worth the wait.
Can you freeze this cheesecake?
This freezes well too as despite munching on it for breakfast it was a lot for the both of us to eat over a weekend. Even for us. So I cut it into slices, wrapped it up in cling film and put them in the freezer. I think the Chief Taster actually preferred them frozen.
A chocolate topping would go nice with this and I did do that on my second attempt. The final version looked so nice, I just scattered some berries on top. Feel free to slather with chocolate on yours!
More low carb raspberry desserts
Raspberry and Hazelnut Cheesecake
Need Metric Measurements?
Use the button options below to toggle between US cups and Metric grams!
Ingredients
Instructions
- Preheat the oven to 180C/350F degrees.
- Line the bottom of a spring-form cake tin with greaseproof or parchment paper.
- Melt the butter in a saucepan.
- Add the hazelnut flour and sugar substitute. Mix thoroughly until the mixture looks like glossy breadcrumbs.
- Spoon the mixture into the cake tin and use a spoon to spread evenly, pressing the mixture down evenly.
- Bake in the oven for 15 minutes.
- Remove from the oven and place in the fridge to cool.
- Place the cream cheese in a bowl and blend with the sugar substitute. I used a hand blender.
- Add the eggs and cream and continue to blend until smooth.
- In a separate bowl or even a jug, use a hand blender to blitz the raspberries until smooth.
- Add the raspberry mixture to the cream cheese mixture and stir thoroughly until even in colour.
- Pour over the hazelnut base and bake in the oven for 30-40 minutes until the centre has a slight firmness. (Don't worry about too much wobble).
- Allow to cool, then place in the fridge overnight.
- Eat and enjoy!
Notes
The information shown is an estimate provided by an online nutrition calculator.
Follow me on Facebook for extra bits and fun! https://www.facebook.com/DivaliciousRecipes
If you make this, share it! Tag your photo on Instagram with #divaliciousrecipes





Cecilia
Do you think I can use frozen strawberries instead of raspberries?
Angela Coleby
Yes you could. Would be delicious!
Susan
Is it heavy whipping cream or sour cream?
Thanks.
Angela Coleby
Heavy whipping cream
Sue T
Do you use toasted hazelnut flour or raw? Blanched/skinless or skin on?
Angela Coleby
Just raw. It had the skin on. Either will still work out okay though. Loving the idea of toasted though!
Janie
What sugar substitute did you use? does it need to be something dry or can it be wet? Like coconut sugar vs. honey or maple syrup?
Angela Coleby
I a dry sugar substitute such as xylitol. You could use wet in the crust though and probably the cheesecake as it is a baked cheesecake.
Laetitia
What size springform did you use? Thanks!
Angela Coleby
An 8 inch one. I wish I could find a smaller one here.
SueT
OK, I can't find hazelnut flour locally. Can I just use hazelnuts and grind them really fine?
Angela Coleby
Of course. It's the same thing really. Hope you enjoy it!
Sophie33
I loved this funny post! Good for you to get the hazelnut flours bags for free! What a divine looking glorious cheesecake! waw! Another must make for sure! xxx
Angela Coleby
Glad you enjoyed my shopping adventures Sophie! I now prowl the shopping aisles looking for reduced flour every week, just in case!
Sophie
hahahahahahha! I made your divine cheesecake & loved every scrumptious bite! I also loved the hazelnut flour in this tasty base! 🙂
Angela Coleby
Great to hear!