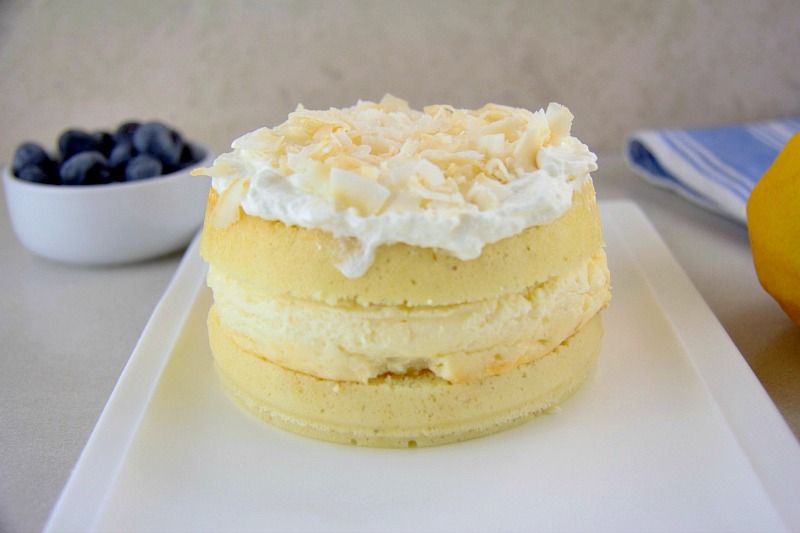
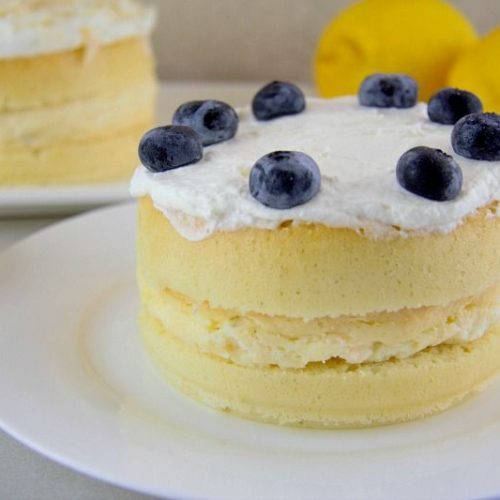
This lemon cheesecake cake has a layer of vanilla cheesecake surrounded by a lemon sponge and makes for a delicious cake any time of the year.
The light lemon sponge cake has a baked cheesecake filling and is baked with coconut flour. I made the sponge by separating the eggs as that makes the lightest coconut flour sponge cake. Whisk the egg whites and fold them into the cake mixture for a cake so light in texture you would never know that this is a low carb sponge.

I’ve been eyeing up my precious lemons that the Chief Taster brought back from the UK and decided to make another cheesecake cake but with lemon. The lemons in my fridge are precious as you can only purchase local lemons in St Lucia when they are in season. When the Chief Taster requested slicing a lemon for a drink, I growled like a Tigress over her cubs. It’s for recipes only and blog-worthy recipes at that. I am now contemplating the ferry trip over to Martinique as they have many French supermarkets to stock up on produce and ingredients that I can’t purchases here. Perhaps a cheeky hair appointment too.

Ever since I first baked my red velvet cheesecake cake I vowed to make this with another flavour, so lemon it was! As it was a lovely sunny day, a lemon cheesecake cake seemed the right flavour to use.
I used a couple of 4-inch spring form cake tins as they are an easier serving for the two of us as well as looking cute. This mixture should work in an 8inch spring form cake tin too. However, if the sponge layer is too thin for you, simply bake another cake layer.

I served our lemon cheesecake cakes with two different toppings to see which one worked best. Whipped cream was slathered over both cakes, one was topped with blueberries, and the other topped with desiccated coconut. They were both delicious and no outright winner was announced. Use your own topping on your lemon cheesecake cake and let me know what was the winner for you!
More low carb lemon cakes

Lemon Cheesecake Cake
Need Metric Measurements?
Use the button options below to toggle between US cups and Metric grams!
Ingredients
Cheesecake Filling
- 8 oz Cream cheese softened
- ¼ cup Erythritol
- 1 medium Egg
- ¼ cup Whipping cream or heavy cream
- 1 tablespoon Vanilla extract
Cake
- 6 medium Eggs separated
- ⅓ cup Coconut flour
- ½ cup Erythritol
- ½ teaspoon Baking powder
- 1 Lemon juice & rind
Instructions
FILLING
- Pre-heat the oven to 180C/350F degrees.
- Grease and line the cake tin with parchment paper. It must be the same tin that you will use for the cake too.
- In a bowl beat the cream cheese until smooth.
- Add the egg and mix thoroughly.
- Add the erythritol, cream and vanilla and blend well.
- Pour into the cake tin (or tins) and spread evenly.
- Bake for 1 hour
- Remove from the oven and allow to cool.
- Once cool, remove the cheesecake from the tin, wrap in foil or parchment paper and place in the freezer for at least 4 hours, but ideally overnight.
CAKE
- Preheat the oven to 180C/350F degrees.
- Grease and line a cake tin (or tins) with parchment paper.
- Beat the egg yolks with the erythritol until combined.
- Add the coconut flour, lemon juice, lemon rind and baking powder. Mix thoroughly.
- In another bowl, whisk the egg whites until stiff and firm.
- Gently fold the egg whites into the cake mixture and combine well.
- Spoon the cake mixture into the cake tin evenly.
- Bake for 20 minutes until the sponge is firm.
- Remove from the oven and allow to cool.
- Slice in half (if you are using just the one tin)
ASSEMBLE THE CAKE
- Remove the frozen cheesecake filling from the freezer.
- Put one sponge on a plate and place the frozen cheesecake on top.
- Place the other sponge on top.
- Decorate as you desire. Slice and enjoy!
Notes
Nutrition
The information shown is an estimate provided by an online nutrition calculator.
This post may contain affiliate links. Please read my disclosure policy for more info.
[amazon_link asins='B00MFC5JVQ,B000Z978SS,B0757H7SCM,B0000VZ59K' template='ProductCarousel' store='divaliciou04c-20' marketplace='US' link_id='abc57b6f-7fbe-11e8-b428-e7ee4c607756']


Leave a Reply